MAKE ·
Make a Phone Stand

Hi friends! We stopped home, last week, long enough for me to see that a rested mind is a productive mind! The kids were so creative. After 7 weeks of travel bliss, on our second day back, our oldest came to show me this idea. (…before doing one little additional Swedish trip | here) .
It knocked my socks off because it’s c-r-a-z-y simple, u-b-e-r-functional and an up-cycle project. Storage problems solved and the kids had a lot of fun personalizing. Our iPhones and phones now all have fantastic stands and we could make these with things we already had in the house. You can, too!
Just click below for the full how-to!


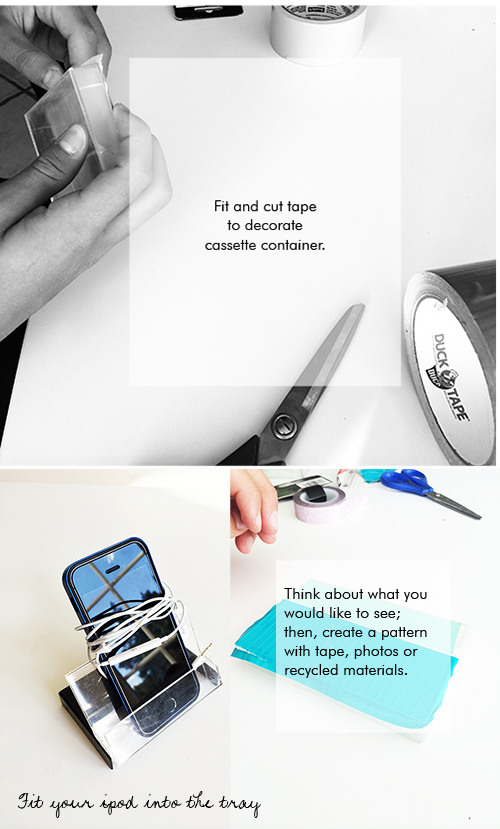
left: The kids used duct tape to create patterns right: For mine: I used photos of the kids so that it serves like a picture frame when I’m using my phone!
Let’s get started:


Materials: scissors (or x-acto knife), transparent tape case, duct tape (or photo) or option 2: photos, recycled packaging and double sided tape.
To make:
To get started, simply turn the transparent cassette case inside out and start creating a duct tape pattern on the outside.
Cut tape to the size of each side and smooth edges and your phone stand is ready to use!
To use: Fold the case open, place on flat surface and insert your phone into the small cup.
Happy Making!
Photo Frame Option: I wanted to make my iPhone stand dual purposed and cut black and white photos to fit into the tray side that is exposed when I am looking at it on my desk. After cutting my photo to fit this area, I simply attached it with thin doubled sided tape along the edges. I love looking at favourite photos while I’m using my phone!


Something you might like:


I love this chance to meet. Come visit our Facebook willowday Page and like us. For more projects like this, come visit our Pinterest Page. Or join me for Instagram for daily posts, too.
Would you like to add simple, everyday, creativity to your family — or travel with us to Sweden — just sign up here and never miss a post.


